|
 |
 |
 |
 |
| Menu: |
| Home |
| Store |
| Buying |
| X-Sales |
| Info |
| FAQ's |
| Contact |
| Links |
 |
| Fallschirmjager.Biz Information Helmets: Faking a Fallschirmjäger Helmet: 1 |
| Why would I want to make a replica German
Paratrooper Helmet I hear you ask? Well there are two reasons.
The first is that it shows you how easy it is to fake a genuine
Fallschirmjager Helmet based on a cheap Indian produced copy.
This will never fool the experienced collector but it could
fool the novice collector, so I hope it helps to identify fakes!
The second reason is that many collectors will never be able
to afford a genuine Paratrooper helmet due to their increasing
value and rarity. So if you can't get a genuine one why not
reproduce one to fill the gap in your collection till you do
come across the genuine article!
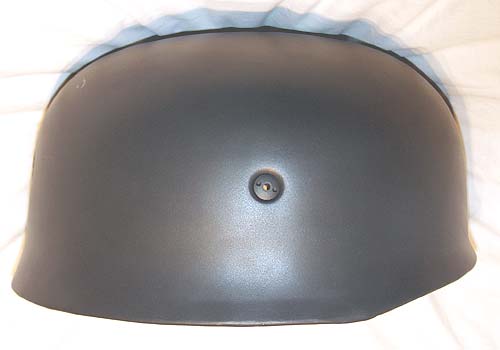
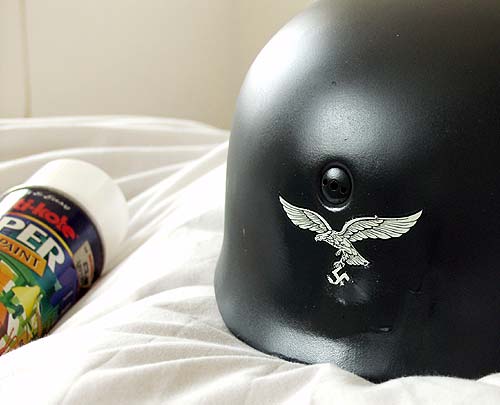
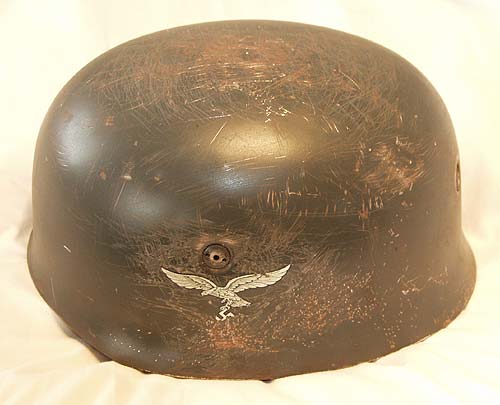
You will notice on many online auction sites a whole host of replica German paratrooper helmets, some good, some bad and some very good indeed. Most admit to being replica but watch out, many are faked, just as I am about to demonstrate how they are faked! So save yourself hundreds of pounds and make your own - yes even replicas can sell for several hundred pounds plus! I'll be adding to this page as I progress with this project so please keep coming back to see progress. So lets get going. Week 1: Purchase your cheap helmet. These can be found on many common online auction sites for approx. £40 plus, depending on quality. The one below is very basic and would never fool a collector. It comes without any markings internal or external but I'll soon change that. Note the zig zag stitching. A clear giveaway that the helmet is a copy! |
|
Pic 1 - Brand new Repro Helmet |
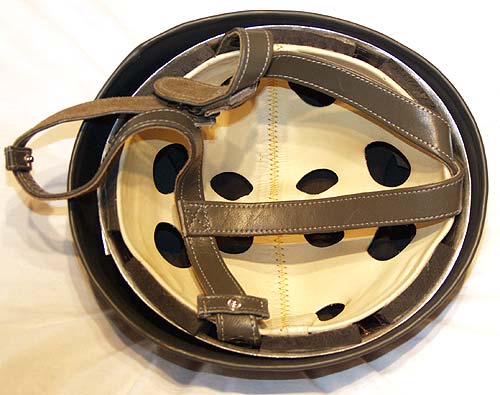
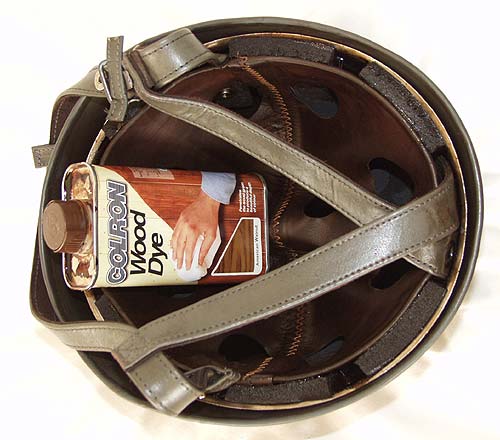
Pic 2 - Brand new repro helmet liner |
| Purchase some cheap helmet decals, again available from many auction sites. These vary in quality and in likeness to the originals. I bought two sets just to show you the difference. Use a good German Paratrooper book as a basis for choosing your eagle as there are several types and you want the eagle to mach the period of the helmet. I also sell pre aged decals here! |
Pic 3 - Two sets of repro decals |
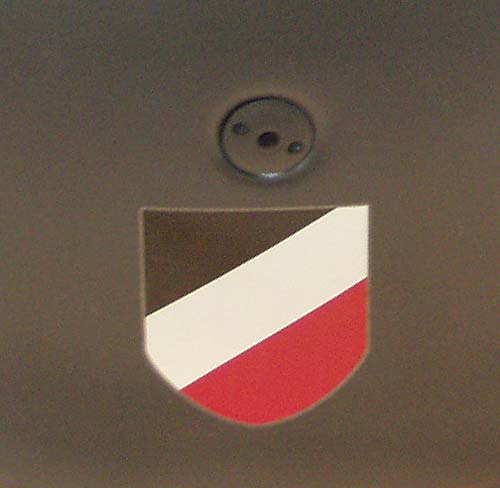
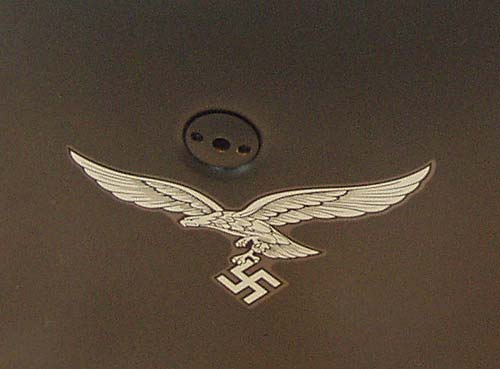
| These are applied by filling a saucer of warm water place in the decal for approx. 30 seconds and sliding into place on the helmet. Be careful as they can tear very easily. The two pictures below demonstrate their placing, although my eagle and tri colour are not in line with the helmet bolt. A good thing to check on originals as pretty much most are. I placed mine off center on purpose as I want to ensure people can see it is fake! |
Pic 4- National colour's decal applied |
Pic 5 - Eagle decal applied |
| Week 2: After waiting a few days just to be sure the decals were 100% dry and fixed I examined their adhesion in close detail. The national colors seemed fine but as I lightly rubbed the eagle half of the swastika fell off! Oh well, that will have to be battle damage! I realised that once I started to 'age' the helmet both decals would likely come off so I sprayed each of them with clear acrylic paint. I gave them several thin coats letting each coat dry in between coats. The picture below shows the light 'shine' from the spray. |
Pic 6 - Acrylic spray applied to decal |
| At this point I also drew in some markings to the liner, these were based on original markings but again I have ensured that the layout is incorrect deliberately. You can buy replica helmets with the lining markings in place. I used a waterproof marker pen and drew them freehand but you could trace an original picture thus ensuring the font is as near as possible to an original. |
Pic 7- Makers mark applied by hand |
Pic 8- Liner and helmet sizes applied by hand |
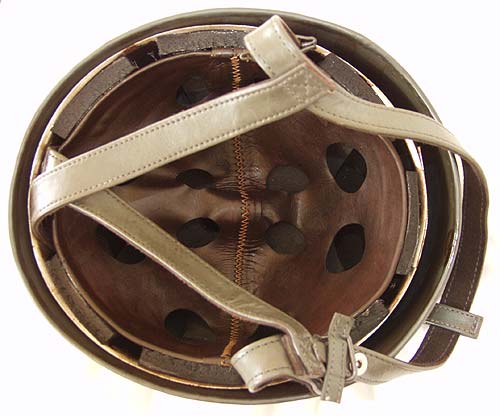
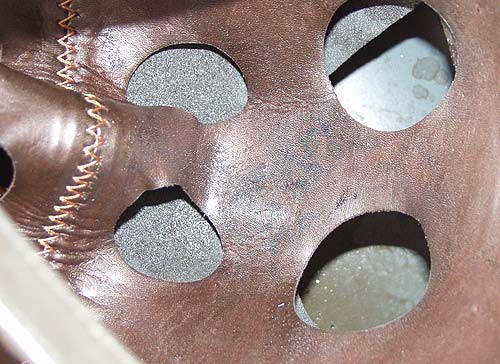
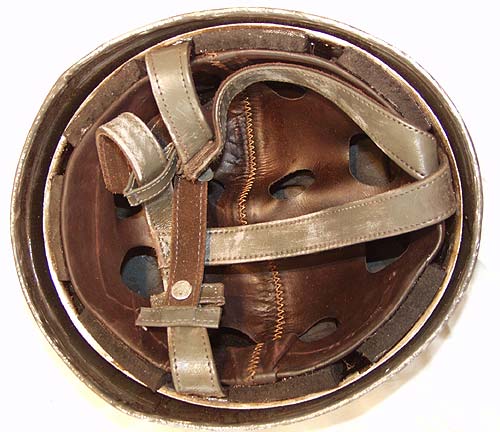
The lining markings look a bit amateur but that doesn't worry me too much as once I've started aging them they will be pretty difficult if not near impossible to pick them out. But depending on how you want the aging and condition of your helmet should reflect the effort you put into your liner markings. The 'Gr' indicates the lining and helmet sizes. Now I've come to the fun bit, aging the liner! So what do you use? Well there is a whole host of techniques to age the liner. I wanted a very old, well worn, slightly damaged look to the liner, so I used some wood stain and painted the whole inside of the liner including all the straps both inside and out. Don't forget the edges and try and get round behind the liner holes also! The next three pictures show you the result of the wood stain, as you can see the markings are becoming more difficult to read and make it look a lot less drawn by hand. However everything looks shiney & new still and we want it to look 60+ years old! Note how the outer straps are unaffected by the wood stain. also notice how the liner stitching does not pick up the stain, so we will have to do something about that also! Notice also how neat and new looking the lining holes are almost 'off the shelf' look and that's no good. anyway I'll address that problem later and move onto ageing the outside of the helmet. |
Pic 9 - Stain the liner with wood stain |
Pic 10 - Liner fully stained with wood stain |
Pic 11 - Liner markings now very difficult to read |
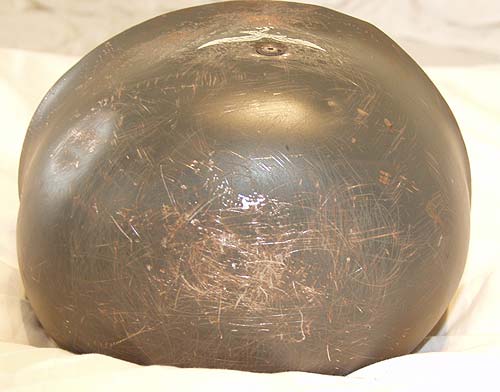
So how do we age the outside of the helmet? Well most of you will have guessed by now I think! Bash it about! That's right use a hammer, drill, rough sandpaper and general garden stones to make lots of scratches dents and marks. Lets bear in mind that many replicas just use a helmet like mine and then paint over it. That's no good. A helmet has a life span just like us. It starts out young and fresh then gets to middle age - worn but still capable and then gets old and pretty much not good for anything other than sitting there to be admired by the younger generation! So our helmets ageing process has to replicate this. The new fallschirmjager will have a brand new helmet, it will be used in training and then in his first combat missions. It will be receiving light to medium wear by now, most likely without camouflage. We need to replicate that scenario and build a basis for future wear. so we are in its first 'year' of ageing. Notice how you create 'wear' on the parts that would normally receive wear i.e. the top - where the Fallschirmjäger would lay down his helmet on the ground and on the rim which is most prominent to be caught and rub against battlefield items e.g. trucks, tanks, trees etc. Make sure that you do also create wear and tear elsewhere, reflecting where the young fallschirmjäger moves through terrain e.g. trees, buildings etc!
|
Pic 12 - Shell scratched and bashed about |
Pic 13 - Large dent visible - scratches in normal wear positions |
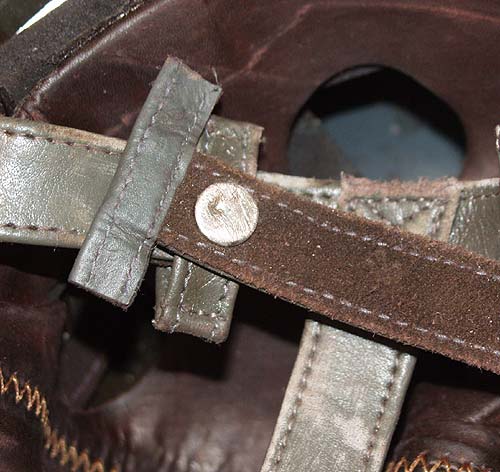
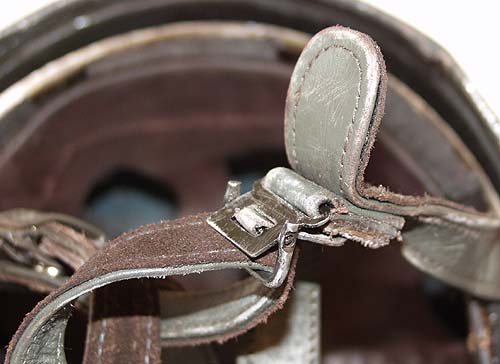
Notice also that you need to wear down the straps and strap fittings. Use a center punch and sandpaper also make a twist on the strap buckle to reflect being caught on the door of a vehicle. The straps need to wear as much as the helmet many replicas seem to forget this. See the picture below for strap rubbing and ageing. You will notice how new looking the outer straps are in the three pictures below, that will be taken care of later! Also you can still see how everything looks 'off the shelf' and unworn especially the strap buckles! |
Pic 14 - Dent to chinstrap fastening button & scratched |
Pic 15 - Sand down the chinstrap's in various places |
Pic 16 - Fastening strap also sanded and worn |
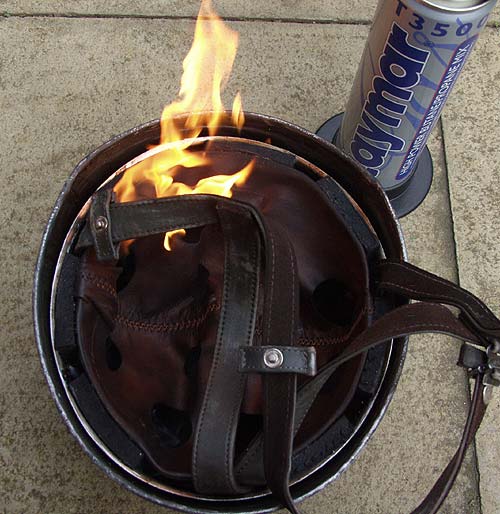
Now this is the really fun bit, we get to play with fire! So here is the disclaimer for those who are not of the age of consent. Do not attempt these techniques without adult supervision as it could result in harm or injury. Using dangerous items such as blowtorches is dangerous, you have been warned and I accept no liability. This is what I use to help age a helmet but you may wish to choose a safer option. Get a blowtorch and gently cover the lining with the torch. You will see that the leather starts to contract. Don't over do it it just needs a gentle flame. Also burn down some of the rubber padding material to take the edge off the pads (see picture below). This is where things went badly wrong for me. I lit a pad, took a picture and one second later the whole helmet went up in flames. I had to run with the helmet to the kitchen sink! The damage was that the inner lining was slightly too taught but hey, who knows what happens to helmets in battle! Make sure you go down each of the straps with the blowtorch and burn off some of the stitching, also burn off the inner helmet liner stitching, this was my solution to the problem of it not picking up the wood dye! You will notice that the straps start to take on a very nice aged 'fold' look to them. In addition burn all the fresh leather away from the edges of the lining holes. |
Pic 17 - Burn the lining, straps and rubber padding |
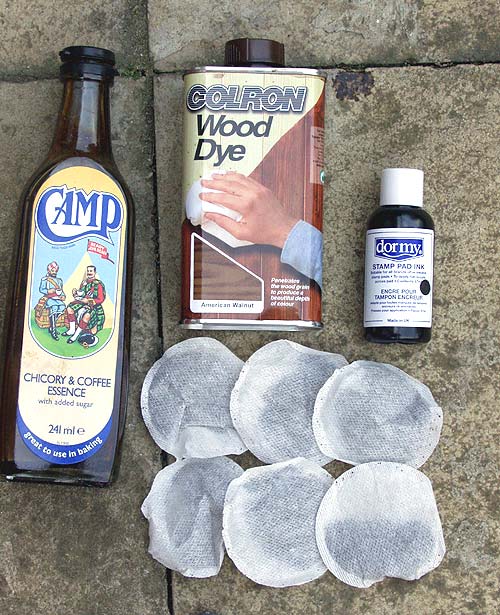
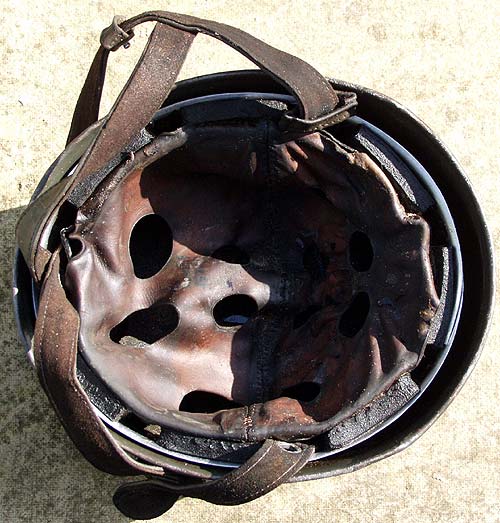
| So we have carried out some of the ageing process, lets carry it on. This helmet has been lying in a ditch for over 30 years before a French farmer discovered it in the 1970's. We need to take the shine off the inner lining. There are many products you can use for this, the picture below shows some of these. I have deliberately kept out the key ingredients that 'fix' and greatly enhance this process to prevent fakers copying it. These products below will wear off without the 'fixers' and just make it very dark and we want ageing! |
Pic 18 - Some ingredients to age the liner and straps |
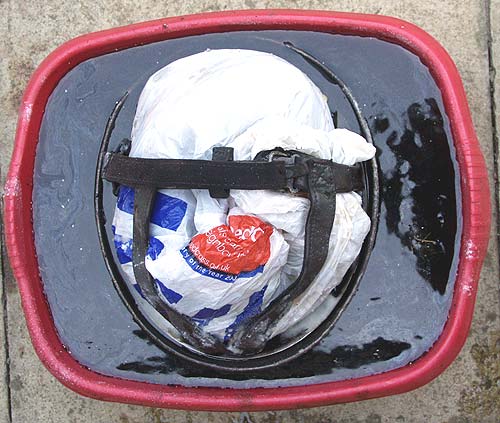
| Mix the ingredients together place them in a basin with the helmet and leave them overnight. Notice I have filled some plastic bags full of sand so that the inner lining retains a nice 'used' shape. This replicates the paratroopers head! Not that I'm implying that paratroopers have brains of sand! You can leave the helmet longer than overnight if you wish to add to the ageing process. |
Pic 19 - Ageing the liner & straps with the ingredients |
| After leaving the helmet in the ingredients for as long as you want, remove and let it dry naturally in the sun. About a day in warm weather will dry it out. We will probably want to age the straps a bit more so that we get a reasonable consistent ageing effect. So many replica makers seem to forget the straps and the small details! |
Pic 20 - Helmet liner pretty much aged |