 |
 |
 |
 |
 |
| Menu: |
| Home |
| Store |
| Buying |
| X-Sales |
| Info |
| FAQ's |
| Contact |
| Links |
 |
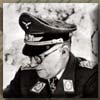
German Army Paratrooper M37 Helmet Decals: The decals below demonstrates them being used on a reproduction M37 Model German Para Helmet with M38 Fittings. The steps below show how the new helmet is given a 'old' lease of life by the application of two pre-aged Army helmet decals and then some light ageing to the helmet. |
|
) |
Step 1. The original helmet is very new, however we want it to have mid to medium wear so we need to choose the appropriate decals before ageing begins. You can either age the helmet first and then apply the decals or visa versa. I prefer to apply the decals first and then age as it allows me to "bed in" the decal. |
) |
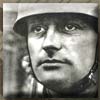
Step 2. Match up the various Heer & National colour decals and find the match closest to the condition you will be making your helmet. Make sure that you choose a decal suitable for the age and model of the helmet. You don't want to add a decal to your helmet that didn't exist for that model! I have used National No 4 and Heer No 2 in this example. |
) |
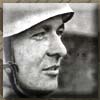
Step 3. Cut out the decal. Use a sharp pair of scissors and make sure that you stick as close to the outside edge of the decal as possible as you don't want to get any of the white background in the decal. If you do get some white sections you can paint these out with paint. The reason these transfers are not 'ready cut' is that they are produced by hand on a very small scale. They are not mass produced Chinese versions! |
) |
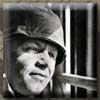
Step 4. After the decal is cut out, just line it up in the area you want to place it. This area will need to be sanded down with wire wool to ensure good adherence. Just make sure you cover all the area and approximately one centimeter all round just to allow flexibility of placement. Make sure you rub very lightly! |
) |
Step 5. Lightly sand down the area you want to apply the decal. Use fine wire wool and do not rub to hard. After all its going to spoil your helmet if you get back to the base metal, so keep the pressure light! The condition of the helmet dictates how much pressure to use! |
) |
Step 6. Use warm water and place it into a saucer. It needs to be about warm but not tepid or boiling. You must ensure the decal is completely covered and left from between 15 to 25 seconds. If you gently touch it and it moves from its backing paper it is ready to apply. |
) |
Step 7. Lift the decal from the water using the backing paper. Gently slide it off onto the area you want it applied. You can move it around gently to ensure it is correctly in position. Once in position use a tissue or light cloth to soak up all the excess water. Place the tissue/cloth on the decal and press lightly. |
) |
Step 8. After removing most of the water as described above, use a cloth or tissue to gently press out any bubbles or trapped water. Work from the centre of the decal and gently but firmly push from the centre to the edge of the decal. Repeat this until you are happy that any trapped air or creases have been removed. Mast round the decal with masking tape. |
) |
Step 9. I don't recommend hand varnishing, I always use spray sealer. The only one that I can recommend that wont damage your decal is 'Plasti-kote Flat clear sealer'. Apply several coats but very lightly and allow to dry between coats. Don't overdo it otherwise you will get runs that are difficult to remove! |
) |
Step 10. Using the sealer now allows you to lightly sand, scratch or cut out areas of the decal without the whole thing coming away from the helmet. In my example I have blended the decal in with the helmet. Leaving it outside for several weeks then helps to blend in the decal fully. Depending on what finish you desire, you may not have to do this! It looks the business now! |
Please Email
me if you want to order any decal or require
further information. |
|
Terms &
Conditions I Privacy
& Copyright Policy I Copyright © www.Fallschirmjager.Biz